


Welcome to ACL 101 – Start Here !
We’re excited to help you get started with Advanced Creative Labs. In this guide, you’ll learn the basics of creating your first brand, starting your first project, and exploring core features. Let’s dive in!
💡 There's a help guide for each of the Use Cases
Key Concepts
- Brands: Central hubs in ACL where you can manage your visual assets, copy, and guidelines.
- Projects: Workspaces within a brand for specific campaigns, tasks, or use cases.
Step by Step
Step 1: Creating Your First Brand

- Navigate to the ‘Brand Setup’ tab.
- Click ‘Create New Brand.’
- Fill in your brand details and upload any logos or style guide PDFs.
💡 Pro Tip: Use high-resolution logos for the best output quality.
Step 2: Starting Your First Project

- Go to your Dashboard and select "New Project."
- Choose from a range of strategic, creative, or content-focused project types.
- Once you’ve selected your project, you’ll want to enter details on your project:
- Project name - be specific so you can differentiate later
- Brand - select your brand from the drop down menu
- Project Brief - Upload a brief and give the platform key objectives, audience details, and any brand-specific info.
- Click Begin
💡 Pro Tip: The more details you provide to the agents, the more tailored your results will be
Step 3: "Running" the Project
- The next step is to start the phases that the agents run for your specific project. Each project has a different number of phases.
- You can either Run All Phases or run each phase one-by-one
- Click Run
- Watch the agents do their magic!
💡 Pro Tip: We recommend first time users Run All Phases at once and then review each phase once they have all completed.
Step 4: Refine, Edit and Re-Run
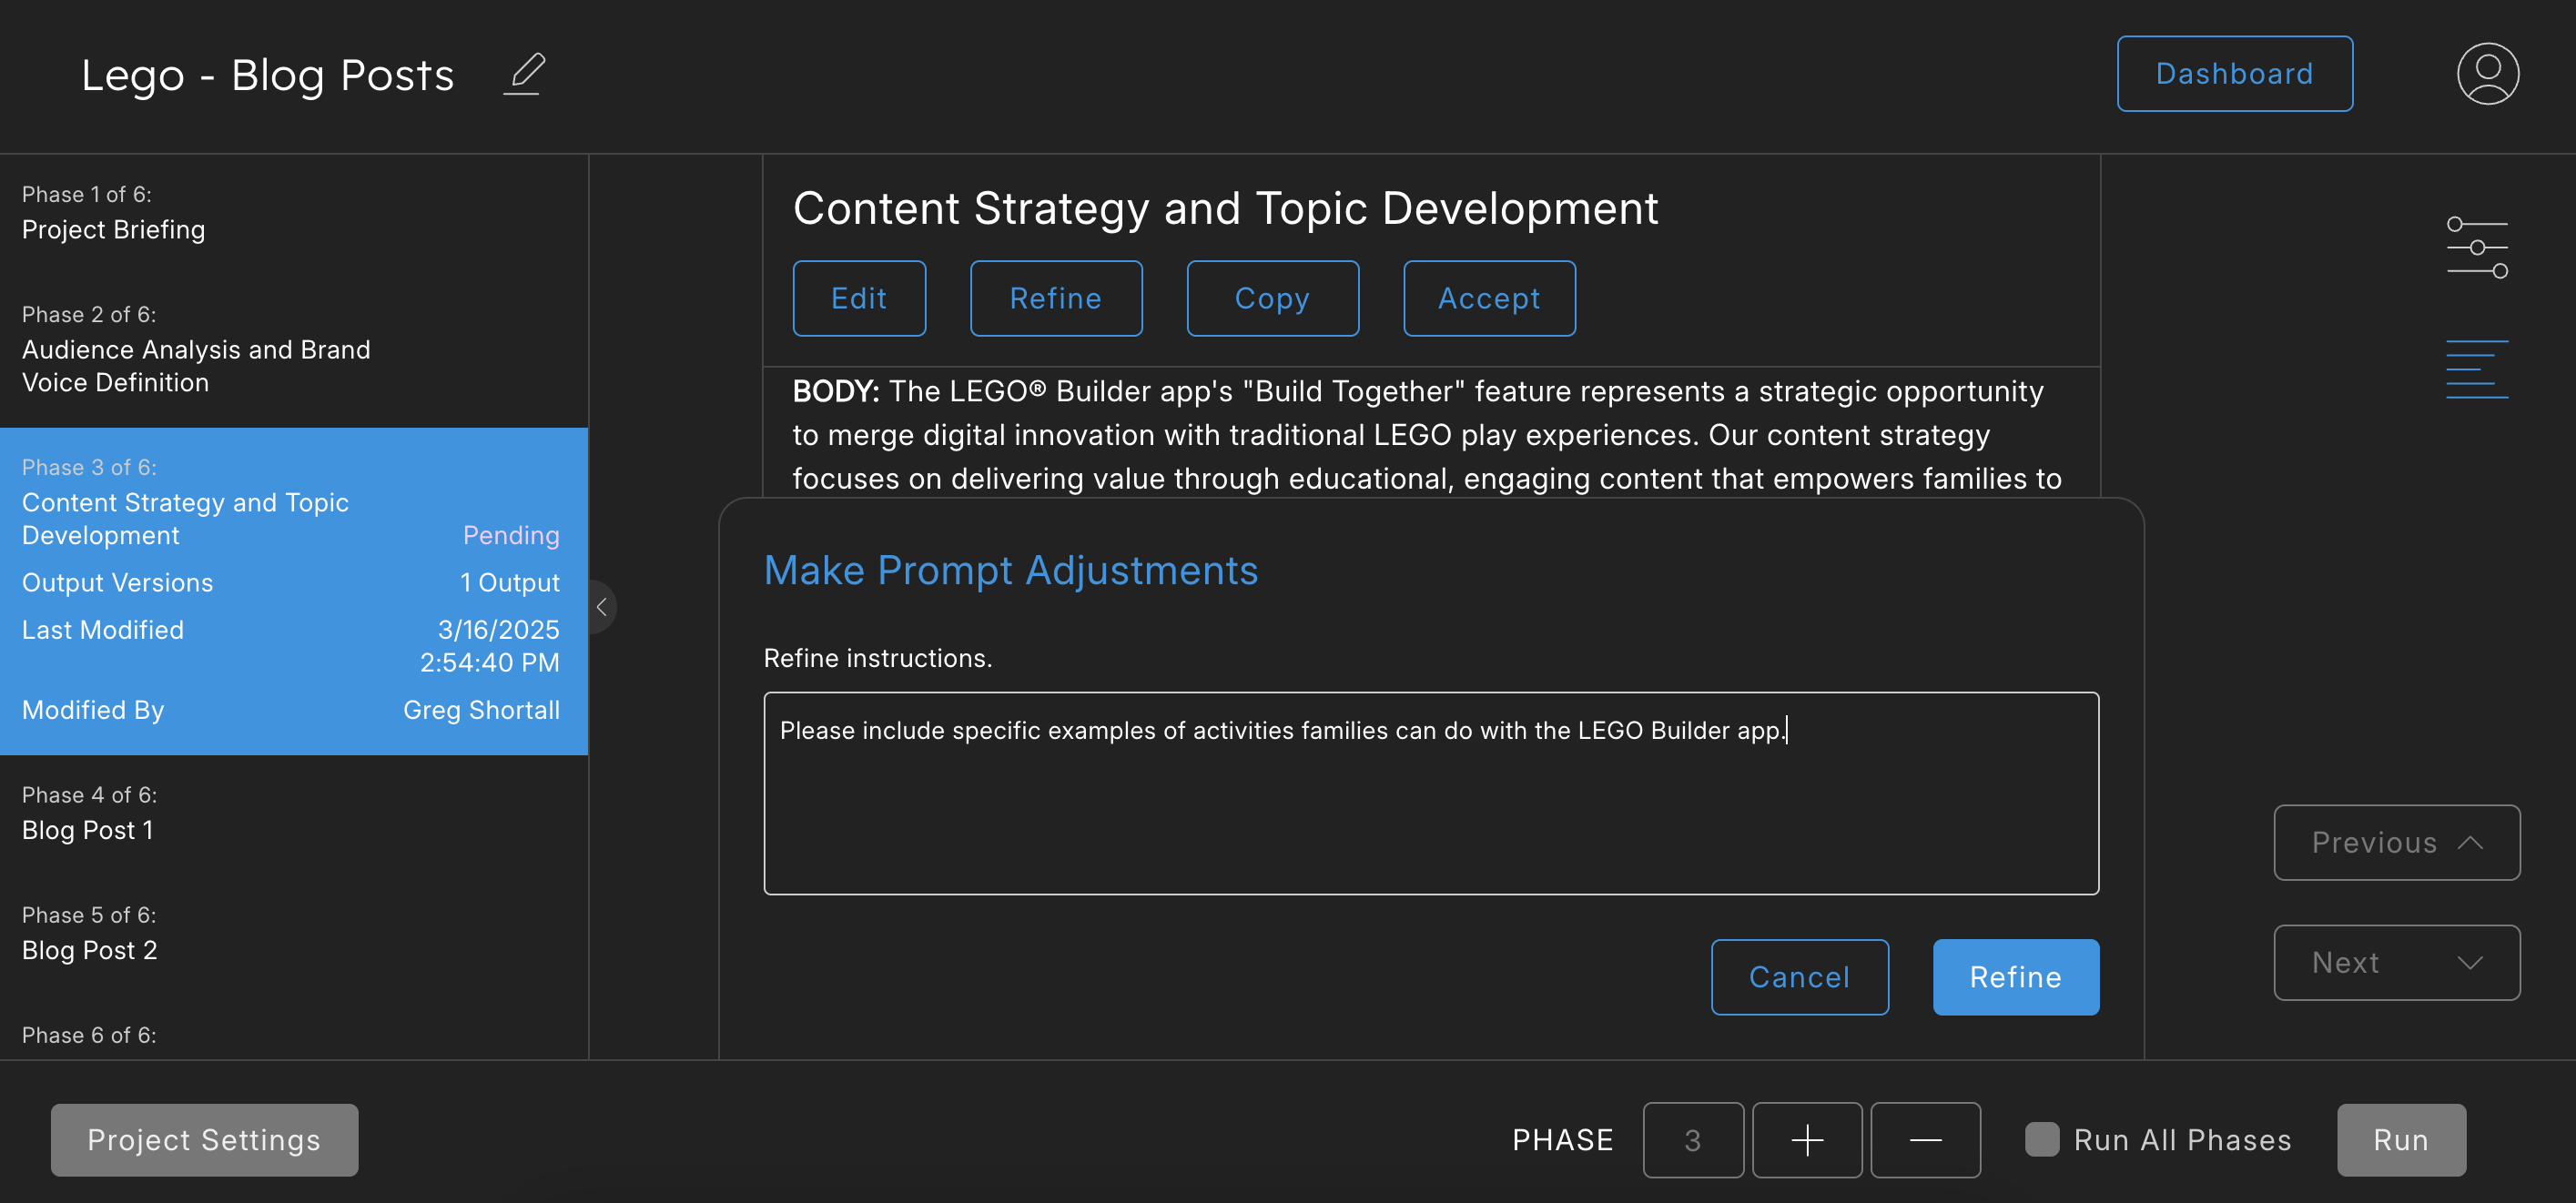
- Once your project has finished running you’re all set! But the real magic happens when you (the human) gets involved in refinement.
- By clicking the “Refine” button, you can give the platform feedback on the specific phase. Once you’ve entered the feedback into the box, you can click “Refine” and this feedback will be reflected in real time,
- You can edit any of the outputs by clicking the “Edit” button and edit any of the phase copy.
- Once you’re happy with the edits, click Run again.
💡 Pro Tip: Refine just like you would give feedback to someone in real life; the feedback can be very specific (eg. “change the target audience to 19-25 year olds”) or very vague (eg. “I like what you did in #1, please give me more of that).
By following these steps, you’ll be ready to take advantage of everything Advanced Creative Labs has to offer!
Ready to go?
If you have any questions, our team is here to help guide you with additional resources and tips and tricks. Reach out anytime at support@aclabs.ai or check out our Help Center for more details.